

Creative Process
10-Minute Brief + 20-Point Checklist for Creators: Music Video Treatment
Use a 10 minute pre-write brief, a tight production template, and a 20 point approval checklist to stop rewrites and deliver music video treatments ready…
By DRVVYN · · 16 min read
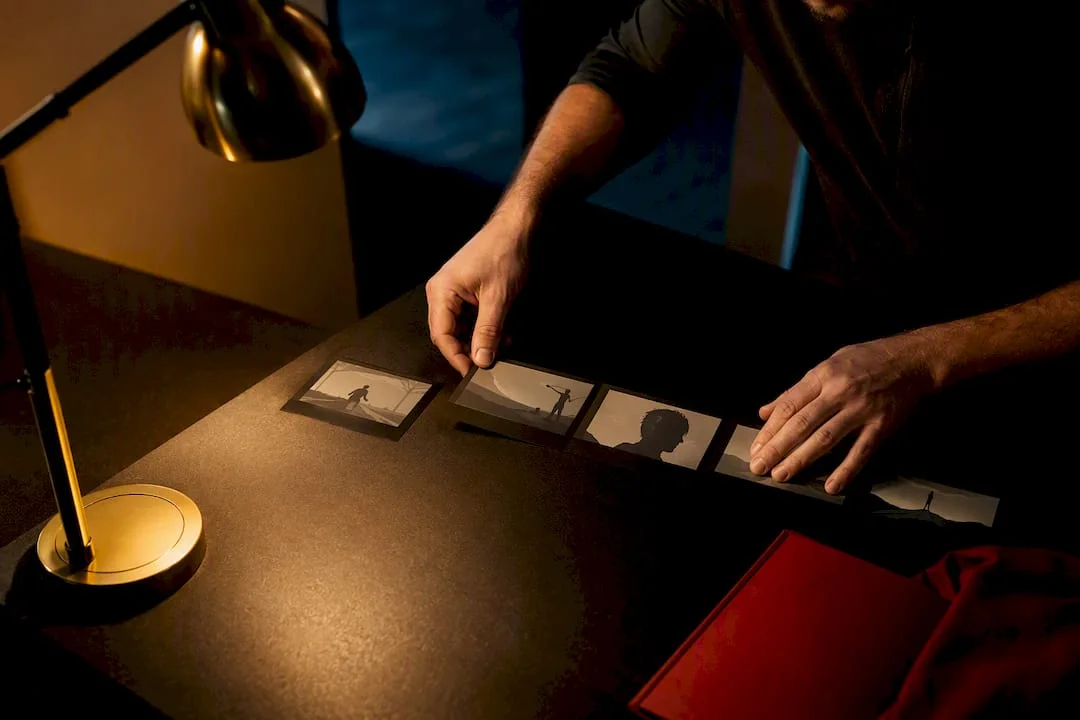
A music video treatment is a short creative document that describes a video’s concept, visual language, and production constraints before a single frame gets shot. Its purpose is alignment: it gets the artist, director, and production team looking at the same vision, and it becomes the reference everyone signs off on before money moves. If you’re pitching an idea, seeking approval from a label or artist, or handing a concept to a production team, you need one.
TL;DR:
- A treatment should clearly define the concept in one sentence, with specific visual rules and constraints that match the video’s ambition and budget limits.
- A well-prepared pre-write brief answering key questions about emotional goals, exclusions, realism, narrative movement, and feasibility helps prevent costly rewrites during production.
- Visual language must be expressed as concrete rules about palette, lighting, camera, and texture, paired with annotated reference images that specify borrowing intent.
- Mapping the song to visual phases with clear, timestamped shifts ensures the scene progression aligns with the music and guides shot planning effectively.
- Converting the treatment into a production-ready script involves scene sluglines, detailed action descriptions, department tags, and explicit notes on effects and costs to prevent on-set surprises.
Why Treatments Matter and What Producers Expect
A treatment sits at the very start of the pipeline, right after a song is chosen for visual development and before a single shot list exists. Artists, managers, directors, and sometimes label reps all read it, each scanning for something slightly different. The artist wants to feel something. The producer wants to know what it costs. The director wants creative room to work.
Treatments function as a de-facto agreement between artists and producers to confirm creative direction before budgets get committed. Skip that agreement and you invite rewrites, scope creep, and the kind of on-set confusion that eats a shooting day. A vague treatment (“it’ll feel cinematic and moody”) gives every reader a different mental image, and those mismatched images surface on set, when it’s expensive to fix them.
Here’s what an experienced production lead actually checks for when reading a treatment:
- Whether the concept can be described in one sentence without losing its meaning
- Whether the visual rules are specific enough to shoot from, not just adjectives strung together
- Whether the stated constraints (locations, cast size, effects) match the described ambition
- Whether references come with intent notes instead of vague mood boards
- Whether the document reads like a plan, not a pitch deck
A treatment that passes all five checks moves fast through approval. One that fails even two of them tends to bounce back with notes, which is exactly the delay a tight pre-write brief prevents.
Pre-Write: The 10-Minute Brief That Saves Rewrites
Most treatment rewrites don’t happen because the writing was bad. They happen because nobody nailed down the concept before drafting started. Spending ten minutes answering a handful of questions before you open a blank page heads off the most common failure mode in treatment writing: repeated revisions chasing a moving target.
Answer these five questions first:
- What’s the single emotional goal? Not a mood board of feelings, one dominant emotion the viewer should walk away with.
- What are you explicitly excluding? Naming what the video is not (no dance sequences, no literal narrative, no dialogue) narrows the concept fast.
- What’s the realism level? Grounded and naturalistic, or stylized and surreal? This decision shapes every visual choice downstream.
- What’s the core narrative movement? A character arc, an emotional escalation, or a pure visual/rhythmic build with no story at all?
- What are the hard production boundaries? Budget ceiling, available locations, cast size, and shoot days, stated honestly.
Once you’ve got those five answers, writing the logline gets simple. A logline is just your emotional goal plus your narrative movement, compressed into one sentence.
Pro Tip:Lock your logline before you write anything else. If you can’t compress the whole video into one sentence, the treatment isn’t ready to draft yet, and every hour you spend writing scene blocks before that sentence exists is an hour you’ll likely redo.
Treatment Format and Essential Sections
A recommended treatment format follows a consistent order: logline, concept summary, song-structure map, visual language, scene-by-scene progression, references, feasibility notes, and an approval checklist. Stick to this order and readers know exactly where to find what they need.
Here’s how to size each section for a one to three page document:
- Logline (1 to 2 sentences): The emotional goal plus the narrative movement, compressed to its essence.
- Concept summary (75 to 150 words): The idea expanded, still without describing individual shots.
- Song-structure map (short table or list): Which musical section maps to which visual phase.
- Visual language (100 to 200 words): The rules governing palette, lighting, camera, and texture.
- Scene progression (bulk of the document): Numbered scene blocks describing what happens and how it looks, tied to the song’s timestamps.
- References (3 to 6 images or clips): Each one with a one-line intent note.
- Feasibility notes (75 to 125 words): Locations, cast, effects, and the biggest cost drivers.
- Approval checklist: A short list the reader can score against before signing off.
The visual language section is where most treatments fall apart. Writers reach for words like “cinematic” or “gritty” and stop there, leaving every reader to imagine something different. State visual rules as logic instead: palette logic, lighting logic, camera logic, and texture logic, each with a concrete example. “Warm amber key light with hard shadow falloff, handheld camera locked to a 35mm equivalent, no diffusion filters” tells a director of photography exactly what to build. “Cinematic and moody” tells them nothing they can act on.
Reference images earn their place only when paired with intent notes. Anyone building a treatment should note what to borrow, where to place it, and what to avoid for every image included, since an unlabeled mood board tends to create disputes later about what was actually promised. A single annotated still beats five unexplained inspiration photos.
Map the Song to the Screen: Scene Progression and Rhythm Mapping
The scene progression section is where a treatment either becomes actionable or stays theoretical. The move is to divide the song into visual phases that mirror its musical structure, then assign a distinct visual shift to each phase.
A reliable five-phase structure works for most tracks:
- Opening (intro/first verse): Establish the world. Wide or static compositions, restrained color, minimal movement.
- Escalation (build/pre-chorus): Introduce motion. Camera movement increases, cuts get slightly faster, color starts to shift.
- Break (bridge or instrumental drop): Pull back. This is often where the emotional turn or narrative reveal lands.
- Climax (final chorus/hook): Maximum visual intensity. Fastest cutting, boldest color, largest camera moves.
- Resolution (outro): Release the tension built through the climax, often mirroring the opening’s visual language with one key difference.
Tie each phase to concrete camera, lighting, and color cues rather than describing the feeling alone. A workable mapping snippet reads like this: “0:45 to 1:15, pre-chorus build: camera shifts from locked-off to slow dolly-in, key light intensity increases 20%, palette shifts from cool blue to warm amber as the vocal enters.” That single line tells a cinematographer what to plan for and tells an editor where the cut density should change.
The song-structure map doesn’t need to be elaborate. A two-column list pairing timestamps with visual phases is often enough for a production team to build a shot list against. What matters is that every phase transition in the music has a corresponding visual decision attached to it, so nothing in the scene progression feels arbitrary.
Translate the Treatment Into Production-Ready Materials
A treatment reads well on a screen but it isn’t a shooting document until someone breaks it down into scene format. That conversion step is where hidden costs and hidden production needs surface, often the exact things that blow a budget mid shoot if nobody catches them early.
Follow this sequence when converting treatment language into a script and department breakdown:
- Slugline every scene. Format each scene block with INT or EXT, the location, and time of day, the same sluglines used in standard scene formatting, so anyone scanning the document instantly knows where and when action happens.
- Convert description into action lines. Treatment prose like “the world feels like it’s dissolving around her” needs a concrete equivalent: “Practical fog fills frame; talent walks through it toward camera.” Directors of photography and gaffers can’t light a metaphor.
- Tag every hidden element. Anything involving VFX, screen replacements, practical effects, wardrobe changes, or specialty props gets flagged explicitly, because translating flowery language into concrete department tags is what actually prevents budget surprises. A line like “her reflection splits into two” needs a VFX tag the moment it hits the page, not the week before the shoot.
- Attach notes for each department lead. Wardrobe, art department, and gaffer notes should live next to the scenes they affect, not buried in a separate document nobody opens.
A treatment turned into a script this way with a tool like storyboard software built for fast turnaround gives every department lead a single source of truth. Skip this conversion step and departments end up improvising on set, which is usually where a modest budget quietly becomes an over-budget one.
Feasibility Notes: Budgeting, Timeline, and Scope Choices
Every treatment needs an honest feasibility section, and honest is the operative word. This is where you state your assumptions about locations, cast size, and effects, and where you flag the choices most likely to drive cost.
The biggest cost drivers in most music video shoots are locations (especially multiple locations requiring separate permits), cast size beyond the artist, and any effect requiring VFX work in post. A treatment that names these upfront gives a producer something real to budget against, instead of a surprise discovered during pre-production.
If the budget or timeline is tight, three moves protect the core idea without gutting it:
- Lean on coverage over locations. Multiple camera angles on one strong location often reads as more ambitious than a scattered multi-location shoot with less time at each stop.
- Consolidate to a single location. One well-lit, well-designed space can carry an entire video’s visual variety through lighting and camera changes alone.
- Favor in-camera effects over VFX. Practical fog, projected light, and reflective surfaces frequently deliver more texture per dollar than a post-production effect, and they don’t add days to the edit.
Sample feasibility language worth adapting: “This concept assumes one interior location, a cast of two, and no VFX beyond color grading. If budget allows for a second location, the resolution phase gains a literal environmental shift; without it, the resolution reads through lighting and wardrobe change alone.”
Pro Tip:Write your feasibility section as a set of trade-offs, not a wish list. Naming what changes at a lower budget shows a producer you’ve already done the thinking they’d otherwise have to do themselves.
Template and Short Sample Treatment You Can Adapt
Here’s a copy-ready structure with word counts you can drop into a blank document right now:
- Title and Logline (1 to 2 sentences)
- Concept Summary (75 to 150 words)
- Song-Structure Map (short table)
- Visual Language (100 to 200 words, stated as rules)
- Scene Progression (numbered blocks, timestamped)
- References (3 to 6, each with an intent note)
- Feasibility Notes (75 to 125 words)
- Approval Checklist (10 to 20 short criteria)
A short sample excerpt, built around a fictional midtempo R&B track called “Slow Fade”:
Logline: A woman revisits an empty apartment room by room, each space stripped of one more memory, until only her reflection remains.
Scene 3 (1:10 to 1:40, pre-chorus): She stands in the doorway of what was once a shared bedroom. Camera slow-pushes from a wide static shot to a tight profile as the light shifts from cool blue to warm amber, echoing the vocal’s rise into the hook. Practical string lights, currently unlit in the wide shot, ignite on the push in.

Feasibility: One apartment location, cast of one, in-camera lighting cues (practical string lights on a dimmer) instead of a VFX glow effect.
For vertical or short-form cuts, tighten the scene count and lean harder on the climax phase, since a 15-second platform edit has no room for a slow build. Some creators now draft a first pass using an AI-assisted treatment generator, and tools built for that workflow can produce a structured skeleton quickly, but AI drafts still need manual refinement to fit an artist’s actual brand and a production team’s real constraints. Treat the AI draft as a starting skeleton, not a finished document, and for teams building fuller AI video pipelines, a broader AI production workflow guide walks through where automation genuinely saves time versus where it still needs a human hand.
How DRVVYN Sound Builds a Treatment
DRVVYN Sound’s approach to treatment writing starts with the same emotional goal question every pre-write brief should ask, but with one added layer: the video has to serve the song’s emotional register first, and the visual concept second. For a track dealing with reflection or healing, that means choosing a visual language rooted in stillness and warm, low-contrast lighting rather than reaching for high-energy cutting just because it’s common in the genre.
An annotated excerpt from that process might read: Logline: A man returns to a childhood home he can no longer recognize, searching each room for a version of himself that no longer exists. That single sentence becomes a scene block: “Scene 2, 0:50 to 1:20: he opens a bedroom door to find it empty except for a single lit window, camera holding static until he crosses the threshold.” Then a feasibility note follows immediately: “One residential location, cast of one, no VFX beyond a color grade shift between rooms.”
That sequence, logline to scene block to feasibility note, is what makes a treatment usable by both a storyteller and a line producer. It’s the same structure worth applying to any concept, and DRVVYN Sound’s visual portfolio shows how that emotional-first approach plays out across different tracks and tones.
Common Mistakes to Avoid When Writing a Music Video Treatment
The single biggest mistake is writing visual language in adjectives instead of rules. “Dreamy” and “raw” mean nothing to a gaffer or a colorist; palette logic and lighting logic do. If a director of photography can’t build a lighting plan from your visual language section, rewrite it.
The second mistake is skipping the pre-write brief entirely and drafting straight into scene blocks. Without a locked emotional goal and narrative movement, scenes drift, and drift shows up as three or four rewrite cycles before anyone signs off.
Other recurring problems worth flagging:
- Reference images with no intent notes, which leaves everyone guessing what’s actually being borrowed from the reference and what isn’t.
- Feasibility notes written as afterthoughts, tacked onto the end in one vague sentence instead of naming the real cost drivers.
- Scene progression disconnected from the song’s structure, where visual shifts happen on arbitrary timestamps instead of musical cues.
- Treatments padded to look impressive, running five or six pages when the internal production version really only needed two.
- No approval checklist, leaving sign-off as an informal verbal agreement that gets remembered differently by everyone involved weeks later.
Every one of these mistakes is fixable at the draft stage. None of them are fixable once cameras are rolling, which is exactly why they matter more than they seem to on paper.
Tailoring Treatments to Different Genres and Artist Brands
A treatment for a high-energy pop record and a treatment for a stripped-down R&B ballad shouldn’t share the same visual language section, even if they share the same template. Genre and artist brand should shape the pacing, the color logic, and the scene count before a single scene block gets written.
For high-tempo genres like pop, dance, or hip-hop, scene progression tends to favor shorter scene durations and more visual variety per phase, since the music itself moves fast and audiences expect the cutting to match. For slower, more introspective genres, like alternative R&B built around reflection or longing, the visual language section should lean toward restraint: fewer cuts, longer holds, and lighting logic built around gradual shifts rather than sudden ones.
Artist brand matters just as much as genre. An artist whose visual identity leans warm and intimate needs a palette logic section that locks that down explicitly (warm amber and crimson tones, low contrast, minimal harsh light) so a director doesn’t default to generic “moody” lighting that doesn’t match the artist’s actual aesthetic. An artist with a bold, high-contrast brand needs the opposite: explicit permission in the visual language section to push saturation and shadow further than a typical treatment would.
The fix is simple: before drafting visual language, look at three of the artist’s existing visuals, whether album art, past videos, or content that already carries a cinematic feel true to their brand, and extract the actual recurring visual rules from those, rather than inventing new ones from scratch.
How to Collaborate Effectively With Directors and Artists
A treatment is a starting point for negotiation, not a locked document handed down from on high. The strongest treatments come from a back-and-forth where the artist’s emotional intent, the director’s visual instincts, and the producer’s budget reality all get weighed against each other before anyone commits to a final draft.
Treatments should give the whole team confidence that the concept is achievable, since balancing the artist’s vision and budget against the director’s creative input is the actual job of the document, not just describing a cool idea. That means sharing an early draft specifically to get pushback, not just approval. Ask the director directly: “What in this scene progression feels hardest to execute?” Ask the artist: “Does this visual language still feel like you?”
Length matters here too. A treatment meant purely for internal production handoff can run shorter, often one to two pages, while a treatment being pitched to a label or outside partner typically needs the fuller two to three page version with more concept framing. Match the document’s depth to who’s actually going to read it.
Keep revisions focused on the scene progression and feasibility sections once the logline and visual language are locked. Reopening the emotional goal after a director has already started visualizing scenes usually costs more time than it saves, and it’s the exact scenario the pre-write brief exists to prevent in the first place.
The Treatment Habit Most Creators Skip, and Shouldn’t
Most advice on treatments focuses on formatting: get the sections right, keep it to a page or two, add some reference images. That’s necessary but it’s not where treatments actually succeed or fail. They succeed or fail on the pre-write brief, the ten minutes almost nobody spends locking an emotional goal before they start writing scene blocks.
The conventional wisdom treats treatments as documents to be polished. We’d argue they’re better understood as decisions to be made early and then defended through every later section. A 20-point approval checklist matters less for the scoring itself and more for the discipline it forces: if you can’t check every box, you haven’t finished thinking, no matter how good the prose reads.
If you take one thing from this, prioritize the brief over the format. A perfectly formatted treatment built on a fuzzy emotional goal will still get rewritten. A rough draft built on a locked logline and honest feasibility notes gets approved faster than either of you expect, and that’s true whether you’re pitching a label or drafting for a quiet, cinematic release that needs its visuals to match the song’s intimacy exactly.
— DRVVYN Sound
Sources
Beyond the template above, a few resources are worth bookmarking. VibeMV’s treatment format breakdown offers more detail on writing visual language as rules. StudioBinder’s breakdown guide walks through converting treatments into shootable scripts step by step. For scheduling a shoot around a release date, release timing best practices are worth reviewing alongside your treatment’s feasibility notes.
- Guide to the Music Video Treatment (Free Treatment Included) | Wrapbook
- How to Break Down A Music Video Treatment (StudioBinder)
- How to Write a Music Video Treatment (VibeMV)
FAQ
What Is the Ideal Length for a Music Video Treatment?
Internal production treatments run one to two pages, while treatments pitched to a label or outside partner typically run two to three pages with fuller concept framing.
Do I Need a Treatment for a Low-Budget or DIY Video?
Yes. A short one-page treatment still aligns everyone on the concept and prevents wasted shoot time, even on a single-location, no-crew shoot.
What’s the Difference Between a Treatment and a Storyboard?
A treatment describes concept, visual language, and feasibility in prose and reference images; a storyboard breaks specific scenes into shot-by-shot visual panels for the shoot itself.
Can AI Tools Write My Treatment for Me?
AI-assisted generators can produce a structured first draft quickly, but the draft still needs manual refinement to match an artist’s brand and real production constraints.
What Should Go in the Approval Checklist?
A short scoring rubric covering clarity of concept, feasibility of stated visual rules, budget alignment, and whether references include intent notes, giving everyone an objective basis for sign-off.